Don’t leave it bare!
Exterior timber coating is something long term property investors simply cannot afford to ignore. Not only does a topcoat treatment preserve the
longevity of your deck and fence, the improvement it gives to the exterior aesthetics of your property will also increase its drive-by appeal and rental
interest.
The purpose of top-coating your exterior timber is simply to water- and weather-proof it. It protects the wood, stops it from warping and preserves
its life. From a usability point of view, top coating also minimises splitting and cracking that can lead to splinters on decks. The best thing
about top-coating is that it is a simple job that seldom require a skilled tradesperson. So rolls your sleeves up and lets get started.
Paint or stain?
There are two types of topcoat treatments for exterior timbers – painting and staining.
The choice you make will depend a number of factors including cost considerations, maintenance schedule and the look you want to achieve. Take a
look at this quick comparison chart to help you get started:

Don’t forget to take into account the plane of your surface. For horizontal surfaces such as a deck that experiences more wear and tear through
heavy foot traffic, painting will prove to be extremely cost ineffective overtime. The same issue however will not affect vertical surfaces such
as decking posts and fences.
Scrimp or splurge?
Whatever choice you make, always make sure you always go for speciality paint or stain products that are designed to withstand the weather extremities
of New Zealand. Inferior products that have not been purpose designed tend to be more inexpensive but will prove to be costly overtime. Don’t
forget that as an APIA member you are entitled to trade level pricing with both Wattyl (through Wattyl trade stores) and Dulux (through Guthrie Bowron
stores) as well as competitive retail discounts with both Mitre10 and Bunnings. Click here for
more details.
Now that you have chosen your purpose designed paint product, it is time to think creatively about how to avoid budget-creep. After all we are gunning
for a simply DIY job that will increase your property worth and rental return!
When you buy your paint product, talk to the store about coverage and whether there is any possibility to thin out the paint or stain so that they go further.
Respect their product knowledge and follow their instructions.
Depending on the state of your deck,you will be surprised at how much you can do with a bit of vinegar and baking soda. Bye bye industrial strength
cleaner and water blaster!
When you head to your hardware store, you will be faced with a great array of brush and mop products to choose from. Make sure you select the applicator
that is designed for the paint or stain that you have chosen for the project. For small one off jobs, you don’t always need the top of the range
brush. However for bigger and more repetitive jobs, a good quality brush will deliver a better finish with less paint. Talk to speciality
staff members at the store to help find the best applicator for the job.
Overall process
Whether you paint or stain, there is an overall process to follow when you topcoat any exterior timber. Follow these steps to achieve a quality finish
that will protect your wooden surfaces for years to come!
- Clean surfaces thoroughly before painting. Stripe away any existing finishes. Remove dirt, dust, mildew, and loose wood fibres
to improve product adhesion and achieve a more consistent finish. - Set nails and screws flush or below the surface. If below, fill the holes with an exterior-grade wood filler to give you a flat finished look
and keep moisture out. - Apply a paintable water-repellent preservative before priming to inhibit mildew and rot. To skip this step when you are staining, make sure you
choose a product that contains the preservative. - Take the time to prime all surfaces, it will improve product adhesion, moisture protection and give a longer longevity to the life of the finish –
well worth the effort! - Make sure you paint or stain all surfaces including those that are not directly exposed to the elements. Take care to coat the end grain.
- Repeat coating as directed by the manufacturer’s instructions.
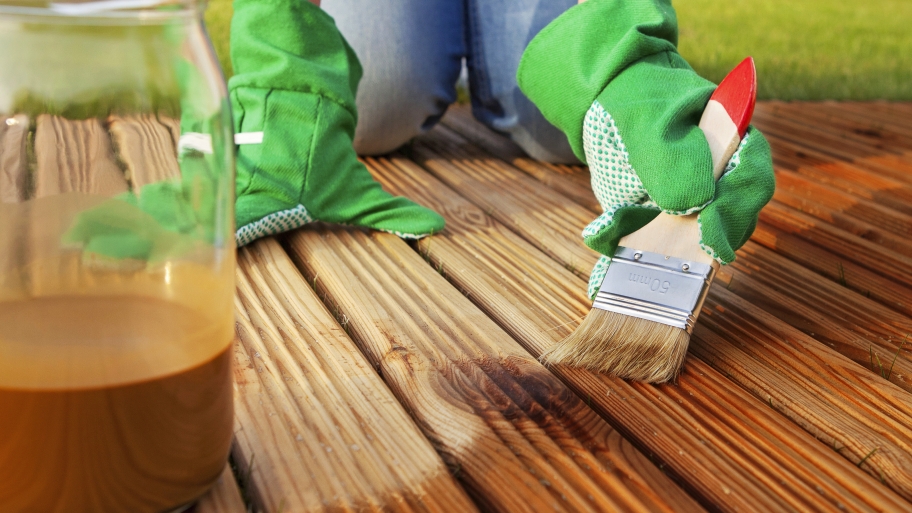
Staining
Staining is a popular choice these days because it delivers a more natural finished look that is favoured by the modern Zeitgeist. With minimal preparation
and faster application, it is also the type of weekend project that can easily fit into the schedule of a part time investor.
Here is an example project tool kit and some tips to help you get started:

| 1. Timber prep | 2. Hard synthetic bristle brush | 3. Deck oil/stain | 4. Deck stain mop | 5. Paint brush |
- Keep an eye on the forecast and only stain if you are sure it will not rain in the next couple of days;
- To avoid visible seams coat section by section, timber length by timber length;
- Give new decks one whole season before staining for better penetration;
- Use a paint brush at the house edge for more precision staining but a speciality staining mop to speed up the job;
- Over applying the product can cause filming and peeling over time, make sure you follow the manufacture’s instructions and apply the right
amount of stain.
Painting
Compared to staining, painting can at first come across as arduous but delivers a longer lasting finish which means you do not have to revisit the project
for a few years. As the coating is thinker, painting also delivers a more comprehensive protection for your exterior timber. Thankfully
with tools such as paint sprayers you will be able to complete your project within a more realistic timeframe. Here is a quick step by step guide
to take you through the painting process:
Here is an example project tool kit and some tips to help you get started:

| 1. Paint sprayer | 2. Timber paint | 3. Drop sheet | 4. Gloves | 5. Masking tape | 6. Paint roller & tray |
- To avoid paint blistering, do not paint in direct sun-light;
- For brush application, take the time to work the paint into the brush before applying to avoid drip marks;
- Never second coat over a wet undercoat;
- If you are using a paint sprayer, choose a paint that is designed to be applied by a sprayer;
- Trim surrounding trees and shrubs before painting or shield them from your project with a piece of plywood inserted vertically between
your fence and the vegetation; - For left over paint that you intend to discard, use a waste paint hardener so that you can dispose of the paint with your normal rubbish.
So here you have it! A nice and easy summer project to transform the street appeal of your rental property. If you do go ahead
to spruce up your exterior timber this summer, make sure you save some before and after photos and share them on our .
Good luck!


Add Comment